words and photo by Melinda MyersDress up your salads, sandwiches and snacks by growing microgreens. These mini sprouts are easy to grow, ready to harvest in…
words and photo by Melinda MyersDress up your salads, sandwiches and snacks by growing microgreens. These mini sprouts are easy to grow, ready to harvest in less than two weeks and require no special growing equipment.
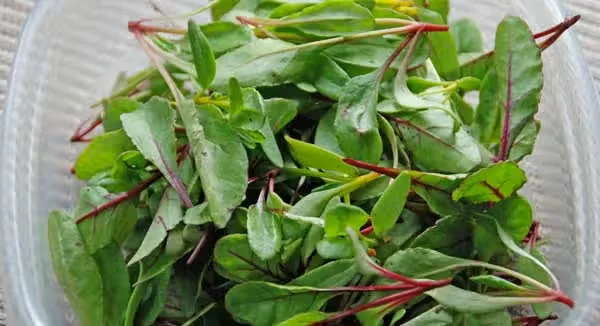
Start by picking up seeds specifically labeled for growing microgreens or organic sprouting—think sunflower, kale, radish, or cilantro. These are meant for this purpose and haven't been treated with any harmful chemicals, so you can grow and eat with confidence.
Radish microgreens bring a pleasant little kick to salads and sandwiches. Cilantro microgreens deliver a flavor similar to the mature herb but noticeably milder. And sunflower sprouts? Kids of every age love them. They've got a nutty, munchable quality that makes them a perfect standalone snack.
Equipment for growing microgreens: You'll need a shallow container with drainage holes. You can buy a dedicated sprouting tray, or just repurpose a clean fast-food container by punching a few holes in the bottom. Snap the clear lid back on and you've got yourself a mini greenhouse that traps heat and moisture to speed up sprouting.
Fill that container with a quality seed-starting mix like Hsu Germination+ organic seed starting mix. It holds moisture well and includes naturally occurring beneficial soil microbes that give your seedlings a leg up. Leave about half an inch of space between the soil surface and the rim of the container.
Scatter the seeds across the soil surface and gently press them in. Give them a gentle watering—either a soft stream from a watering can or a few mists from a spray bottle. Pop the cover on to hold in humidity and hasten sprouting, then set the container in a warm, dark spot.
Once those little green shoots break through the soil, take the cover off and move the container to a sunny windowsill or under grow lights. Keep the seed-starting mix consistently moist, but don't drown it—think damp sponge, not soggy mess.
How and when to harvest microgreens: Your microgreens are ready to cut once they've developed a set of true leaves—the ones that actually look like the plant you're growing. That usually takes about 10 to 14 days, and your greens will stand roughly two inches tall.
Grab a sharp pair of scissors and snip the greens just above the soil line. Rinse them well right before you serve them. Any extras can go unwashed into a ventilated plastic bag in the fridge, where they'll keep nicely for several days.
Trust me—once you realize how simple microgreens are to grow and how wonderful they taste, you'll want to expand your operation. For a steady supply of these nutritious little powerhouses, just sow a fresh batch every four or five days and enjoy the bounty!
Melinda Myers has written more than 20 gardening books, includingThe Midwest Gardener's HandbookandSmall Space Gardening. She hostsThe Great Courses "How to Grow Anything: Food Gardening For Everyone"DVD set and the nationally syndicatedMelinda's GardenMoment TV & radio segments. Myers is a columnist and contributing editor forBirds & Bloomsmagazine and was commissioned by Hsu for her expertise to write this article. Myers' website iswww.MelindaMyers.com.
More from Containers
How and Why We Grow Lettuce in Containers
Container gardening opens up a world of possibilities, especially if you don't have decent ground for a garden. Sure, it has its…
Compact Edible Plants for Small-Space Gardens
Picture this: you're on your back patio, and you reach over to pluck a sun-warmed cherry tomato from a plant barely eight inches…
Uncommon Herbs to Grow at Home
Most of us, when we think of culinary herbs, automatically picture the Mediterranean staples: basil, mint, oregano, thyme, sage,…